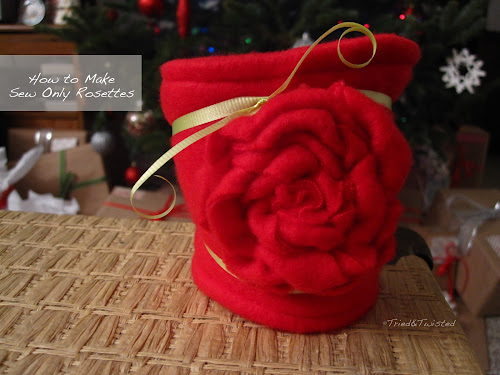
Have you noticed that Crafting 101 demands you know how to make rosette flowers? So many tutorials mention adding pizzazz and upscaling sweaters, bookmarks, ear warmers, or dog collars with the addition of a rosette. And why not? They're simple to make and the result is classy and chic!
Most tutorials suggest hot glue to bind the stripes of cloth together into a rosette, but hot glue can break down over time and won't last in the washer. So here's my personal twist: how to make rosettes entirely with only a needle and thread.
The thickness of the strips will affect the final look of your rosette. In the photo above, the rosette on the top used wider strips closer to 2 inches wide. The rosette on the bottom used skinny strips about 3/4 inch wide. The rows of petals on the bottom are smaller, tighter, and closer together meanwhile the petals on the top are larger and fuller.
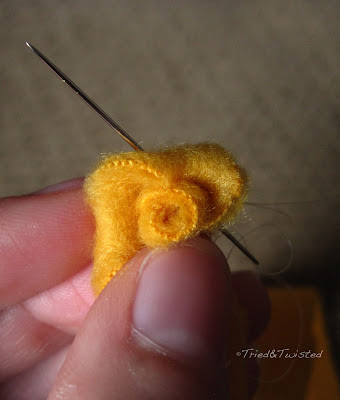
To start, select an end of your strip and roll it. Use the skinnier end if your strip's width varies. Thread your needle, knot the end of your thread, and start by sewing from right to left through the center.
Then make a "t" by rotating the bud 90 degrees and sew from left to right go also through the center. Make sure to sew along the perimeter and not on the face or back of the rolled bud. Trim any thread that may be visible behind your initial knot.
Next, twirl your fabric and continue to roll it about a 1/4 way around the rosebud. Sew from your bottom point, through the center rosebud, and out at the end of your next twirled section of fabric. This twirl will look like a petal. Now, twirl your fabric again, roll it another 1/4 way around the flower, and sew it down again.
Sew into the rosette right next to where your needle last came out, so there won't be so much visible thread. Remember to go all the way to the center bud of the rosette. Repeat this until you have one complete row of petals around your rosebud.
You now have the basic form of a rosette. You can stop with a cute mini or continue adding rows to make a large statement rosette.
As the rosette grows larger, you'll also want to sew through your rows to form another petal every inch or two, instead of only at the top, bottom, right, and left. The more frequently you sew, the stronger the rosette will be and the less likely it will be to have gaps or loose petals.
When you reach the end of your strip of fabric, you can finish your rosette by tucking the tail on the bottom of the rosette and sewing it down. Or if the rosette is not large enough for your taste, you can tuck the end of a new strip of fabric under the tail of the old fabric and sew through the old and new strips. Then twist your new fabric and continue sewing just like before.
There you have it: a lovely Sew Only Rosette that even my Grandma T called incredible!
Rating of difficulty: 2 out of 5. If you're rusty with basic sewing skills, it will be a little harder to get started and keep your thread hidden between the petals and not peaking out from the top or bottom. Since there's so much twisting, twirling, and rolling, it might be hard to keep track of where each stitch should go. My advice is to pick a visible front side of the flower early and to create the basic center rosette all in one sitting. If you create the basic form in one sitting, it will be harder to lose track or get twisted and the form will be sturdy. Then you can add more layers at your leisure.
Comment below and let me know how it goes for you! What project do you have in mind for your rosette? Happy crafting!
Linked at: Craft-O-Maniac , Katie's Nesting Spot


No comments:
Post a Comment