Baby, it's cold outside! As our rather large families gathered together for Christmas by the fire, the time came to watch White Christmas, drink hot cocoa, and stuff those stockings with gifts. One easy, fashionable, and useful DIY gift that snowy day was this fleece ear warmer headband.
A thick ear warmer headband with rosettes or floral details can be so stylish and chic. Variations of this tutorial have been floating around Pinterest and I traced the directions back to Delia Creates. So what if I haven't used a sewing machine since middle school home ec class? How hard could it be, right? Well, it turns out you do have to be able to sew a straight line for her tutorial, so I made a few adjustments to the original design via trial and error to find an easier way to make the same look, even without perfect hems.
Supplies:
Fleece (about 30 by 15 inches)
Buttons
Thread
Sewing machine
Needle
Pins
Supplies:
Fleece (about 30 by 15 inches)
Buttons
Thread
Sewing machine
Needle
Pins
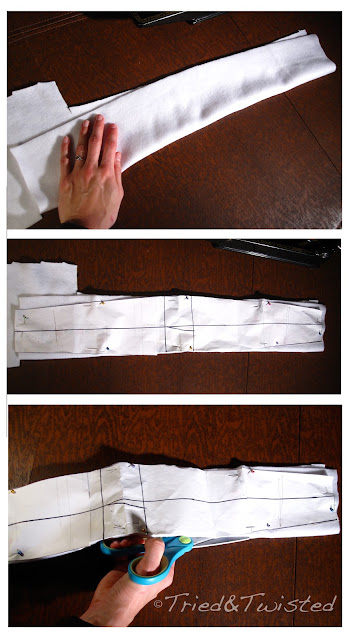
First, create paper templates based on Delia Creates. Pin the paper template to the fleece and cut out two headbands. Fleece is a stretchy material so it will be hard to cut straight, but that's ok. This edge will not be visible when we're done, so don't sweat this stage if it's not perfect.
Now I changed the directions up by cutting two headbands instead of one. This isn't just to keep you warmer. By doubling up, we can do a double hem, which will help to hide any mistakes.
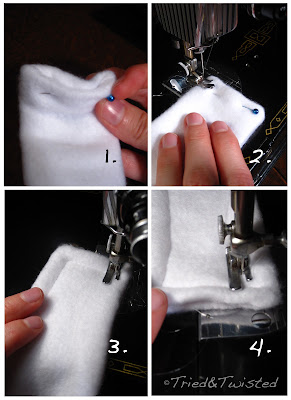
Pull out your sewing machine and sew along three sides about a 1/4 inch from the edge. Keep one of the small ends open.
Then flip your headband inside out. Use a wooden spoon or ruler to push out the edges and corners.
Flatten it out, fold and tuck the unsew edges inside the headband, and pin the hem in place. Sew along all four edges at between a 1/4 to 1/2 inch.
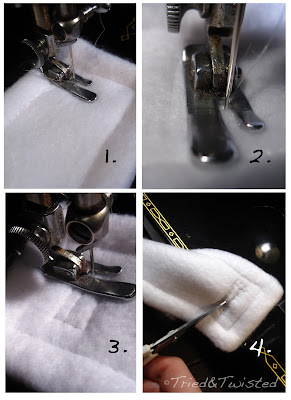
Next, the button hole. We'll use an easy method for this too. Use your sewing machine to sew a rectangle wider than your button horizontally at one edge of the headband. Sew inside your initial rectangle with a second slightly smaller rectangle. Go over these lines two more times to strengthen the border. Then cut a straight slit slightly shorter than your button inside the rectangle. Button hole done!
On the opposite end, sew two buttons so the headband is adjustable.
Finally, add embellishments. Use anything you want -- get creative! Bows, daisy flowers, bedazzle, or rosettes.
Final Rating: 3 out of 5. If you can use a sewing machine and sew in a (relatively) straight line, then you will be able to do this! The ear warmer can easily be made from left-over scraps of fleece, but it makes a quick, practical, and pretty gift.
Stay warm everyone!
Stay warm everyone!


That's super cute! I would be all over this if I HAD a sewing machine! ;) Granted, I could always do what I did in middle school home ec and hand sew it. Great tutorial!
ReplyDeleteIt might take a little longer, but you could totally sew this by hand. I'd love to see photos if you give it a try!
DeleteFound your site on Pinterest and am so glad I did! I'm totally going to make some of these. Maybe using velcro instead of buttons?
ReplyDelete